ドットマトリックスLED

LEDが縦横にいっぱい並んでるやつ。
お買い物
http://akizukidenshi.com/catalog/g/gI-05163/
http://akizukidenshi.com/catalog/g/gM-11246/
GPIO足りんのでドライバも買った。
GPIOのみで点けてみる
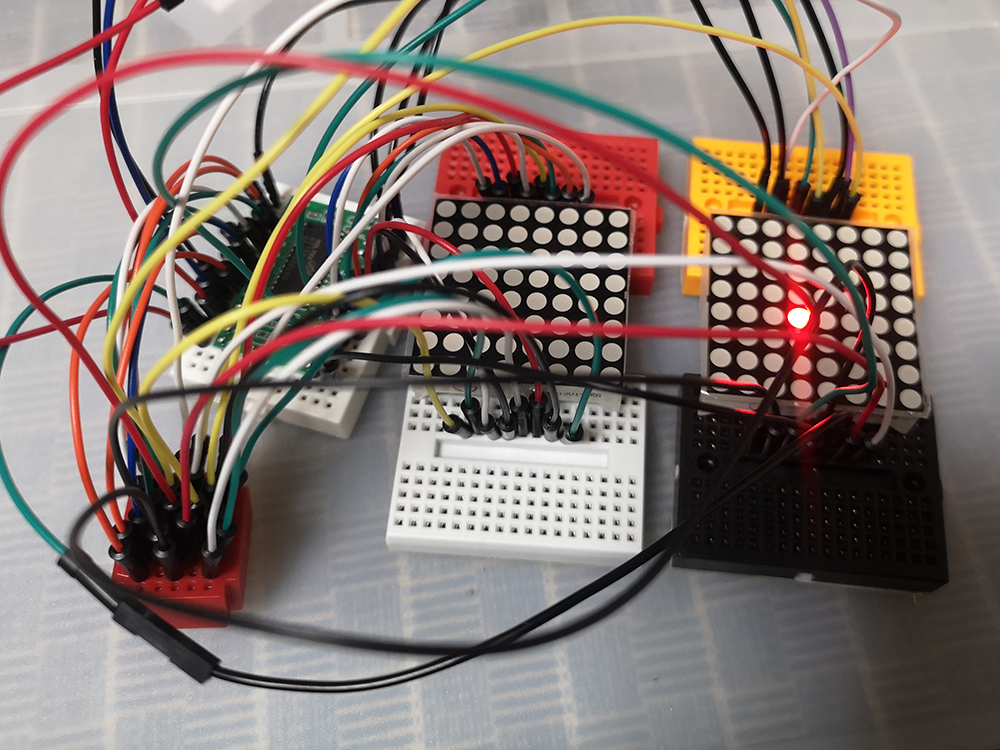
アノードに5Vつけて、カソードにGND、間に抵抗入れてる。
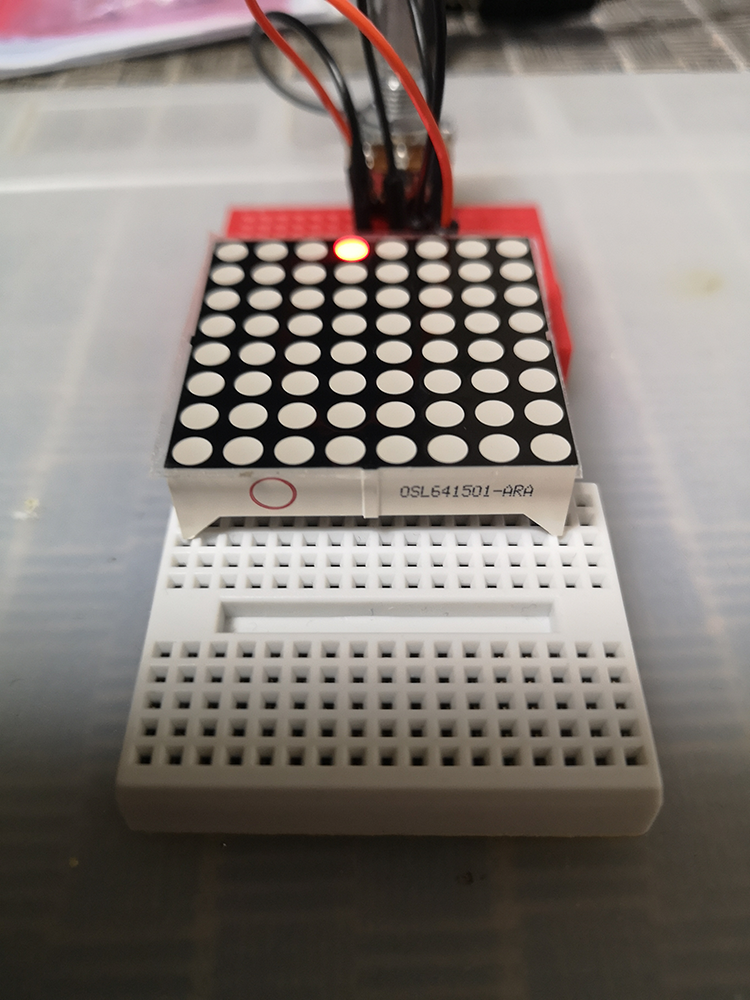
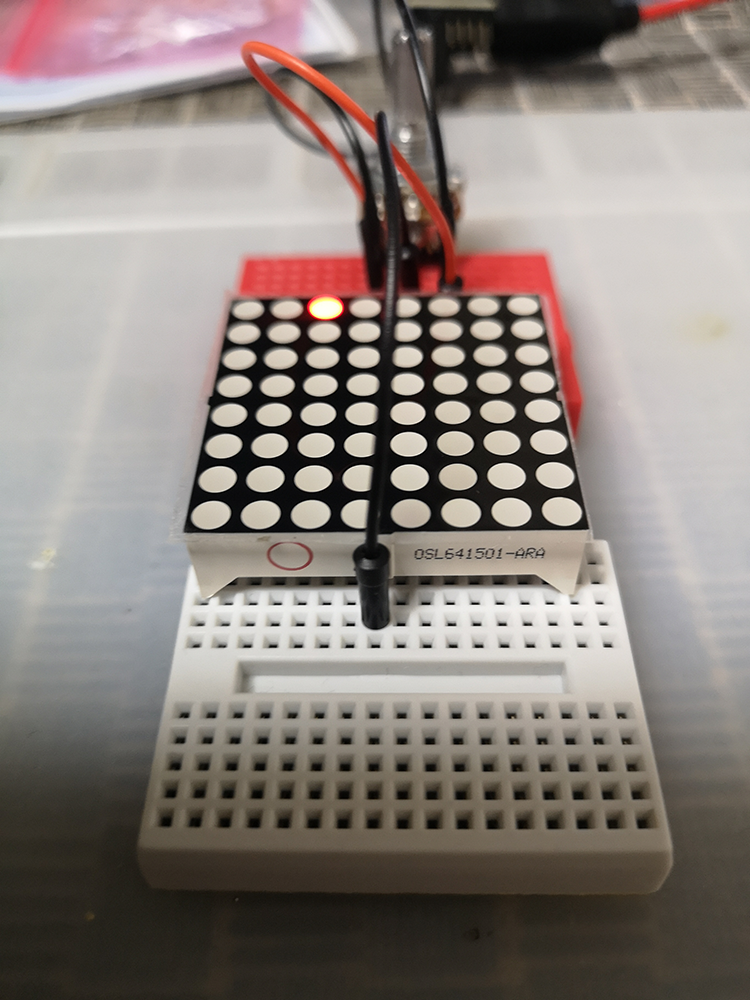
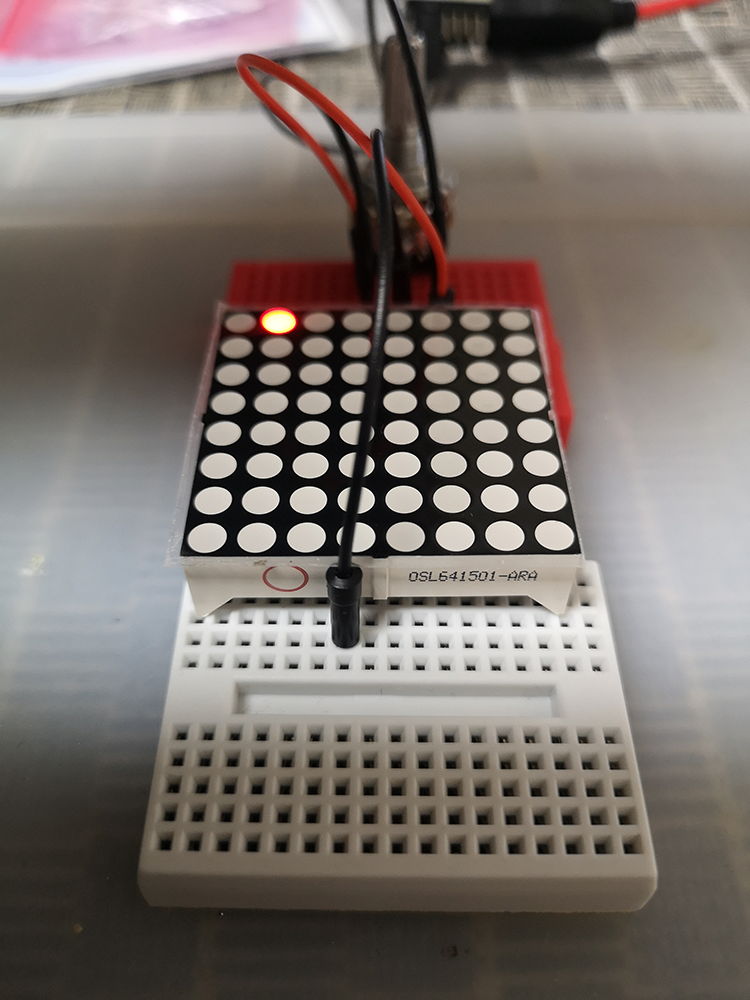

できた。アノードピンとカソードピンが交差したところのLEDが点く。
HT16K33を使う
スケッチ例を動かす
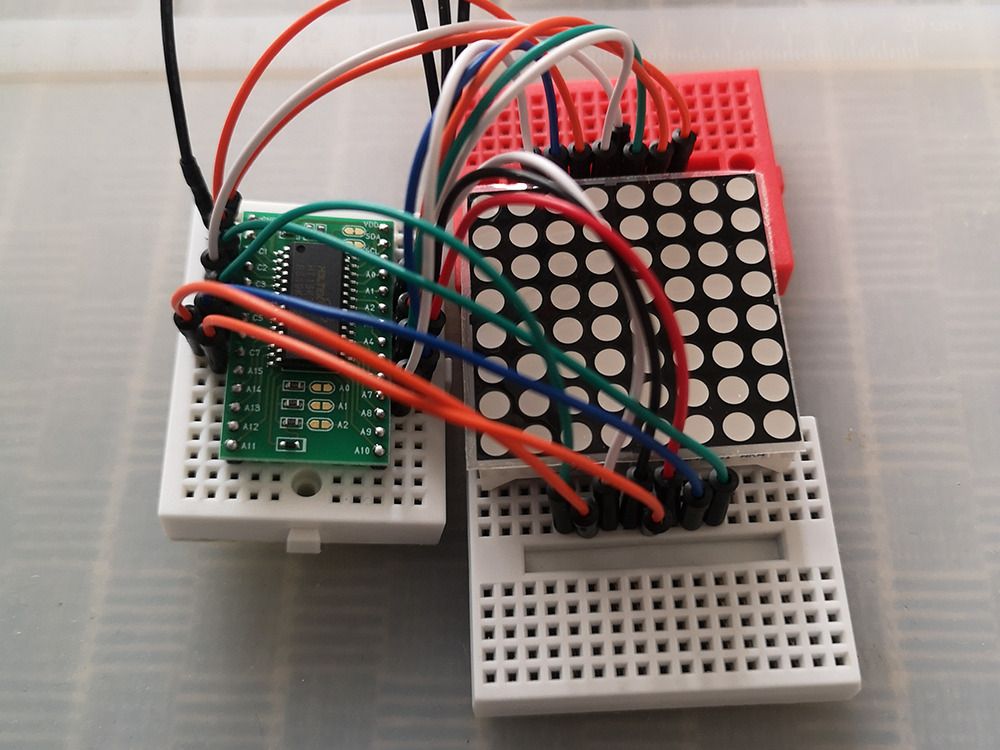
接続しまして。自前でデータシートとにらめっこしながらプログラム書いていくのはつらみがあるのでライブラリを使う。
https://github.com/lpaseen/ht16k33
zip形式でダウンロードして読み込む。スケッチ例のlighttestをやってみる。
16×8をそのまま使ってるので、後ろ8個分が間隔空いてるけどできた。
8×8のLEDを2個使う
すっごい汚い。カソード側は共用できるっぽいので2本まとめてHT16K33につないだ。もんでもっかいlighttestする。
いい感じです。
配列で操作できる感じにしたい
ライブラリのメソッドを見ると
 void    begin(uint8_t address);
  void    end();
  void    clearAll(); // clear all LEDs
  uint8_t sleep();  // stop oscillator to put the chip to sleep
  uint8_t normal(); // wake up chip and start ocillator
  uint8_t clearLed(uint8_t ledno); // 16x8 = 128 LEDs to turn on, 0-127
  uint8_t setLed(uint8_t ledno); // 16x8 = 128 LEDs to turn on, 0-127
  void    define7segFont(uint8_t *ptr); // Pass a pointer to a font table for 7seg
  void    define16segFont(uint16_t *ptr); // Pass a pointer to a font table for 16seg
  uint8_t set7Seg(uint8_t dig, uint8_t cha, boolean dp); // position 0-15, 0-15 (0-F Hexadecimal), decimal point
  uint8_t set16Seg(uint8_t dig, uint8_t cha); // position 0-7, see asciifont.h
  boolean getLed(uint8_t ledno,boolean Fresh=false); // check if a specific led is on(true) or off(false)
  uint8_t setDisplayRaw(uint8_t pos, uint8_t val); // load byte "pos" with value "val"
  uint8_t sendLed(); // send whatever led patter you set
  uint8_t set7SegNow(uint8_t dig, uint8_t cha, boolean dp); // position 0-15, 0-15 (0-F Hexadecimal), decimal point and send led in one function
  uint8_t set7SegRaw(uint8_t dig, uint8_t val); // load byte "pos" with value "val"
  uint8_t set16SegNow(uint8_t dig, uint8_t cha); // position 0-17, see asciifont.h and send led in one function
  uint8_t setLedNow(uint8_t ledno); //Set a single led and send led in one function
  uint8_t clearLedNow(uint8_t ledno); //Clear a single led and send led in one function
  uint8_t setBrightness(uint8_t level); // level 0-16, 0 means display off
  uint8_t keyINTflag(); // INTerrupt flag value, set when a key is pressed
  uint8_t keysPressed(); // report how many keys that are pressed, clear means report as if new
  int8_t  readKey(boolean clear=false);  // read what key was pressed, Fresh=false to go from cache
  void    readKeyRaw(KEYDATA keydata,boolean Fresh=true); //read the raw key info, bitmapped info of all key(s) pressed
  uint8_t setBlinkRate(uint8_t rate); // HT16K33_DSP_{NOBLINK,BLINK2HZ,BLINK1HZ,BLINK05HZ}
  void    displayOn();
  void    displayOff();
  // Some helper functions that can be useful in other parts of the code that use this library
  uint8_t i2c_write(uint8_t val);
  uint8_t i2c_write(uint8_t cmd,uint8_t *data,uint8_t size,boolean LSB=false);
  uint8_t i2c_read(uint8_t addr);
  uint8_t i2c_read(uint8_t addr,uint8_t *data,uint8_t size);
0-127の指定で点灯させる感じ。配置は
| 0 | 1 | 2 | 3 | 4 | 5 | 6 | 7 | 8 | 9 | 10 | 11 | 12 | 13 | 14 | 15 |
| 16 | 17 | 18 | 19 | 20 | 21 | 22 | 23 | 24 | 25 | 26 | 27 | 28 | 29 | 30 | 31 |
| 32 | 33 | 34 | 35 | 36 | 37 | 38 | 39 | 40 | 41 | 42 | 43 | 44 | 45 | 46 | 47 |
| 48 | 49 | 50 | 51 | 52 | 53 | 54 | 55 | 56 | 57 | 58 | 59 | 60 | 61 | 62 | 63 |
| 64 | 65 | 66 | 67 | 68 | 69 | 70 | 71 | 72 | 73 | 74 | 75 | 76 | 77 | 78 | 79 |
| 80 | 81 | 82 | 83 | 84 | 85 | 86 | 87 | 88 | 89 | 90 | 91 | 92 | 93 | 94 | 95 |
| 96 | 97 | 98 | 99 | 100 | 101 | 102 | 103 | 104 | 105 | 106 | 107 | 108 | 109 | 110 | 111 |
| 112 | 113 | 114 | 115 | 116 | 117 | 118 | 119 | 120 | 121 | 122 | 123 | 124 | 125 | 126 | 127 |
こう。これを配列でアクセスするっぽくしたい。悩んだ結果
#include

HT16K33 HT;

uint8_t disptable[8][16][2] = {
  {{0, 0}, {1, 0}, {2, 0}, {3, 0}, {4, 0}, {5, 0}, {6, 0}, {7, 0}, {8, 0}, {9, 0}, {10, 0}, {11, 0}, {12, 0}, {13, 0}, {14, 0}, {15, 0}},
  {{16, 0}, {17, 0}, {18, 0}, {19, 0}, {20, 0}, {21, 0}, {22, 0}, {23, 0}, {24, 0}, {25, 0}, {26, 0}, {27, 0}, {28, 0}, {29, 0}, {30, 0}, {31, 0}},
  {{32, 0}, {33, 0}, {34, 0}, {35, 0}, {36, 0}, {37, 0}, {38, 0}, {39, 0}, {40, 0}, {41, 0}, {42, 0}, {43, 0}, {44, 0}, {45, 0}, {46, 0}, {47, 0}},
  {{48, 0}, {49, 0}, {50, 0}, {51, 0}, {52, 0}, {53, 0}, {54, 0}, {55, 0}, {56, 0}, {57, 0}, {58, 0}, {59, 0}, {60, 0}, {61, 0}, {62, 0}, {63, 0}},
  {{64, 0}, {65, 0}, {66, 0}, {67, 0}, {68, 0}, {69, 0}, {70, 0}, {71, 0}, {72, 0}, {73, 0}, {74, 0}, {75, 0}, {76, 0}, {77, 0}, {78, 0}, {79, 0}},
  {{80, 0}, {81, 0}, {82, 0}, {83, 0}, {84, 0}, {85, 0}, {86, 0}, {87, 0}, {88, 0}, {89, 0}, {90, 0}, {91, 0}, {92, 0}, {93, 0}, {94, 0}, {95, 0}},
  {{96, 0}, {97, 0}, {98, 0}, {99, 0}, {100, 0}, {101, 0}, {102, 0}, {103, 0}, {104, 0}, {105, 0}, {106, 0}, {107, 0}, {108, 0}, {109, 0}, {110, 0}, {111, 0}},
  {{112, 0}, {113, 0}, {114, 0}, {115, 0}, {116, 0}, {117, 0}, {118, 0}, {119, 0}, {120, 0}, {121, 0}, {122, 0}, {123, 0}, {124, 0}, {125, 0}, {126, 0}, {127, 0}}
};

void test() {
  for (int i = 0 ; i < 8; i++) {
    for (int j = 0; j < 16; j++) {
      if (disptable[i][j][1] == 1) {
        disptable[i][j][1] = 0;
      } else {
        disptable[i][j][1] = 1;
      }
    }
  }
}

void dispset() {
  for (int i = 0 ; i < 8; i++) {
    for (int j = 0; j < 16; j++) {
      if (disptable[i][j][1] == 1) {
        HT.setLed(disptable[i][j][0]);
      } else {
        HT.clearLed(disptable[i][j][0]);
      }
    }
  }
}

void setup() {
  HT.begin(0x00);
}

void loop() {
  test();
  dispset();

  HT.sendLed();
  delay(1000);

}
3次元配列を使ってみることにした。これがいいのか悪いのかはわかんない。動かしてみると
動いた。とりあえずここまで。